Oracle Cloud Free Remote Workstation: Step-by-Step Setup
Setting up a free remote Linux workstation can sound complicated at first. This guide follows the real journey from a new Oracle Cloud account to a working machine you can access from your own computer.
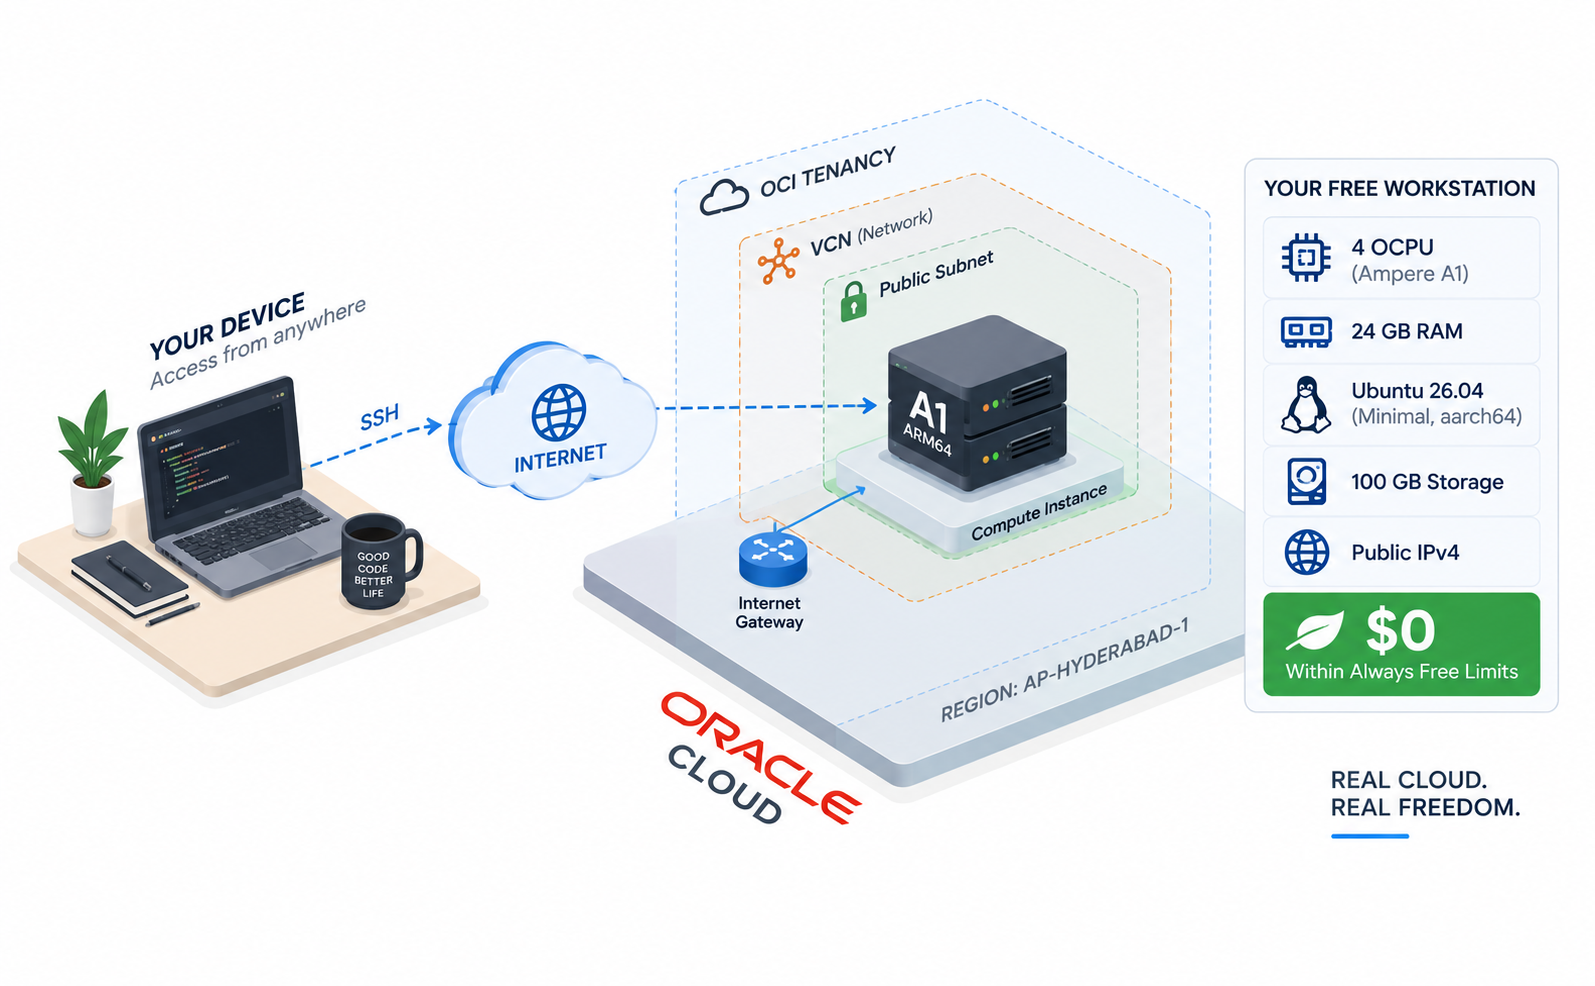
We will create an ARM64 workstation with 4 OCPU and 24 GB RAM, then connect to it over SSH. We will also set up a budget alert so you receive an early warning if anything creates a charge.
Oracle’s allowances, available capacity, console labels, and verification policies can change. Check Oracle’s current Always Free and pricing documentation before you create anything. This setup remains free only while it stays within the applicable allowance.
What you will build
| Resource | Configuration |
|---|---|
| Shape | VM.Standard.A1.Flex |
| Architecture | ARM64 / aarch64 |
| CPU | 4 OCPU |
| Memory | 24 GB RAM |
| Operating system | Ubuntu Minimal aarch64 |
| Boot volume | 100 GB |
| Access | Public IPv4 and SSH |
| Target cost | $0 within the applicable Always Free limits |
Here is the overall journey:
Create Oracle Cloud account
        ↓
Understand the A1 allowance and capacity limits
        ↓
Upgrade the tenancy to PAYG
        ↓
Wait for PAYG to become active
        ↓
Create the A1 Flex instance
        ↓
Download an SSH key and connect
        ↓
Create a $1 budget alert
        ↓
Remote workstation ready
Step 1: Create an Oracle Cloud account
Complete Oracle Cloud’s Free Tier signup process, then choose a home region. Choose carefully: Always Free compute resources are associated with this region, so select the one where you want the workstation to run.
Once the account is ready, open the Oracle Cloud Console. Do not worry about creating the virtual machine immediately—we first need to understand the resource limits.
Step 2: Understand the first limitation
It is easy to assume that an Ampere A1 Flex shape can be configured with 4 OCPU and 24 GB RAM simply because the shape supports it. The shape and your free allocation are different things.
On an unpaid tenancy, the A1 allowance may only cover the equivalent of a continuously running 2 OCPU / 12 GB machine. That is not enough for the configuration in this guide.
There is a second, separate issue: A1 capacity. Oracle may report that it has no A1 capacity in the availability domain you selected. This does not necessarily mean your account or VM settings are wrong.
| What happened? | Meaning | What to do |
|---|---|---|
| Free allocation is too small | The requested size exceeds your tenancy’s allowance | Use a qualifying configuration or upgrade to PAYG |
| A1 capacity is unavailable | The requested hardware is not available in that location right now | Try another availability domain or try again later |
Step 3: Why upgrade to Pay As You Go?
Upgrading to Pay As You Go (PAYG) does not mean every resource immediately costs money. It means the tenancy can use paid services if needed, while qualifying Always Free resources can still remain free.
For a PAYG tenancy, the applicable A1 allowance can be up to:
3,000 OCPU-hours per month
18,000 GB-hours per month
The workstation in this guide fits inside those figures for a 31-day month:
CPU: 4 OCPU × 24 hours × 31 days = 2,976 OCPU-hours
RAM: 24 GB × 24 hours × 31 days = 17,856 GB-hours
This calculation assumes you do not have other A1 instances using the same allowance.
PAYG is not a hard “free forever” switch. Review your resources and usage regularly, and do not create paid resources unless you understand their cost.
Step 4: Upgrade the tenancy safely
In the console, look under Billing & Cost Management for Upgrade to Pay As You Go. Oracle’s interface can change, but the upgrade option is in the billing area.
Enter a valid card and use the exact billing address associated with that card. Do not change the address to make the form easier to complete—mismatched billing details can cause verification problems.
Oracle may place a temporary verification authorization on the card. This is different from a charge for VM usage; check Oracle’s current documentation and your bank’s policies for the precise amount and reversal timing.
After submitting the upgrade, wait until the console explicitly shows that PAYG is active:
Upgrade submitted
        ↓
Oracle verifies the account
        ↓
PAYG status becomes active
        ↓
Create the virtual machine
Step 5: Create the A1 Flex instance
When PAYG is active, go to:
Navigation Menu
    ↓
Compute
    ↓
Instances
    ↓
Create instance
Give the instance any clear name, such as oracle-remote-workstation.
Choose the operating system
Select an Ubuntu Minimal image for aarch64 (ARM64). Ampere A1 is an ARM machine, so an x86/AMD64 image is not the right choice.
Operating system: Ubuntu Minimal
Architecture:     aarch64 / ARM64
Choose the shape and size
Under Shape, select:
VM.Standard.A1.FlexThen set:
OCPU:   4
Memory: 24 GB
If you see a capacity error, try another availability domain or try again later. Repeatedly submitting the same request does not create extra capacity.
Step 6: Configure networking and storage
For a first setup, it is fine to let Oracle create a VCN and subnet if you do not already have a network. The important result is that the instance has network access and, if you need direct SSH access from home, a public IPv4 address.
Make sure Assign a public IPv4 address is enabled, then set the boot volume to 100 GB.
A public IP makes the server reachable from the internet. After setup, restrict SSH port 22 in the security rules to your trusted IP address or range whenever possible.
Step 7: Create and protect the SSH key
Oracle needs an SSH public key so that you can log in safely. If you do not already have a key pair, choose the option to generate one, then immediately download the private key.
It may have a name like:
your-ssh-key.keyKeep this file private. Do not upload it to GitHub, email it, paste it into chat, or include it in a screenshot. Anyone with the private key may be able to access your machine.
Before clicking Create, review the important details:
Shape:       VM.Standard.A1.Flex
OCPU:        4
Memory:      24 GB
Image:       Ubuntu Minimal aarch64
Boot volume: 100 GB
Public IPv4: enabled
SSH key:     configured
Then click Create and wait until the instance status shows Running.
Step 8: Find the public IP and connect
Open the instance details and find its Public IPv4 Address. In this guide, we will write it as YOUR_PUBLIC_IP so you do not accidentally share your real address.
On Windows, open PowerShell and change to the folder containing the private key. For example:
cd Downloads
ssh -i your-ssh-key.key ubuntu@YOUR_PUBLIC_IP
Replace your-ssh-key.key and YOUR_PUBLIC_IP with your actual values. For an Ubuntu image, the username is usually ubuntu; follow the connection instructions shown in the Oracle Console if they differ.
The first connection may ask whether you trust the host. Confirm the IP address is the instance you created before accepting it.
Your computer
      │  SSH
      ↓
Internet
      ↓
Oracle Cloud Ubuntu VM
If SSH does not work
Check these items before recreating the VM:
- The instance status is Running.
- You copied the current public IPv4 address.
- The
-ipath points to the matching private key. - You are using the correct image username, usually
ubuntu. - Network security rules allow inbound SSH on port 22 from your location.
Step 9: Set a $1 budget alert
Because PAYG allows billable services, set up an early warning before you forget. Open:
Billing & Cost Management
    ↓
Budgets
    ↓
Create Budget
Create a monthly $1 budget, add your email address, and choose an alert for actual spend.
A budget is an alert, not a spending cap. Oracle does not automatically stop resources just because the budget is reached.
Step 10: Stop the VM when needed
To stop the compute instance, go to Compute → Instances, choose your VM, then select Actions → Stop. Start it again from the same page when you need it.
Stopping compute does not automatically make every attached resource free. Check storage, networking, backups, and any other services before assuming there are no charges.
Final checklist
- Oracle Cloud account and home region selected
- PAYG upgrade completed and active
- Billing address matches the payment card records
-
VM.Standard.A1.Flexselected with 4 OCPU and 24 GB RAM - ARM64/aarch64 Ubuntu image selected
- 100 GB boot volume configured
- Public IPv4 and SSH key configured
- Private SSH key stored securely
- SSH connection tested
- $1 budget alert enabled
You now have a practical remote ARM64 Linux workstation. The key is to understand the difference between VM shape, free allowance, and physical capacity—and to keep an eye on billing while you use it.
Comments